

Have you noticed cracks forming between the bricks on your chimney?
Chimneys serve as both functional necessities and attractive design features that define your home’s character. But like any exterior structure, they face constant exposure to weather, temperature changes, and time itself.
Maintaining your chimney’s structural integrity isn’t just about appearance. It’s about protecting your family’s safety and preserving your investment.
Loose mortar joints can lead to water damage, structural instability, and costly repairs down the road.
That’s where tuckpointing comes in. This important maintenance process can save you thousands while keeping your chimney strong and beautiful for years to come.
Let’s find out why this technique matters for every homeowner.
What is Chimney Tuckpointing?
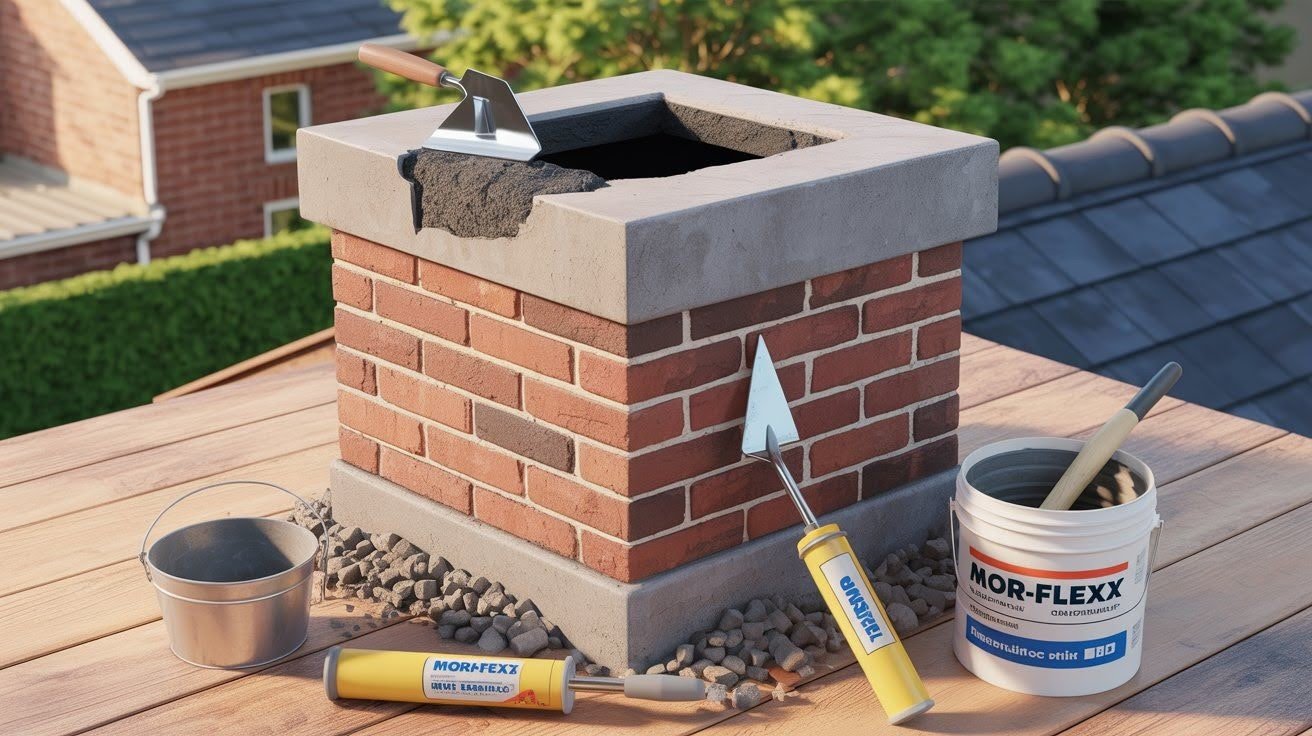
Tuckpointing is a repair technique that fixes damaged mortar joints in brick or stone chimneys. When mortar between bricks cracks or crumbles, this process restores both structural strength and appearance by completely removing old mortar and replacing it with fresh material.
The process involves grinding out deteriorated mortar and filling joints with new material that cures for maximum durability.
Professional masons can also match colors to maintain your home’s original look.
Common materials include traditional Portland cement-based mortar for strength and weather resistance, or modern latex acrylic caulks like Mor-Flexx that offer better flexibility and reduce future cracking.
The choice depends on your chimney’s age and local climate conditions.
Signs That Your Chimney Needs Tuckpointing
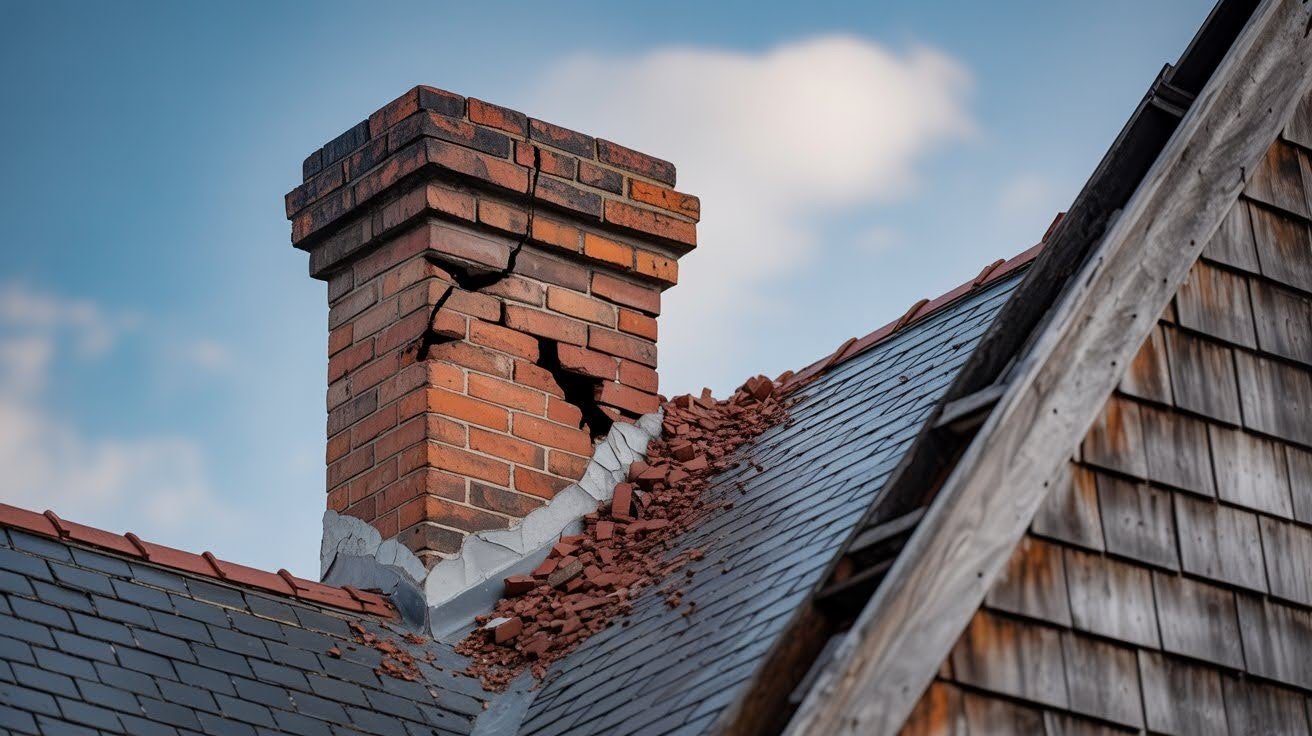
Your chimney shows clear warning signs when it needs professional attention. Recognizing these indicators early can save you from expensive repairs and safety hazards.
Visible Damage
Look for cracks running through mortar joints or crumbling mortar falling to the ground. Loose or damaged bricks that appear crooked or ready to fall out also signal trouble.
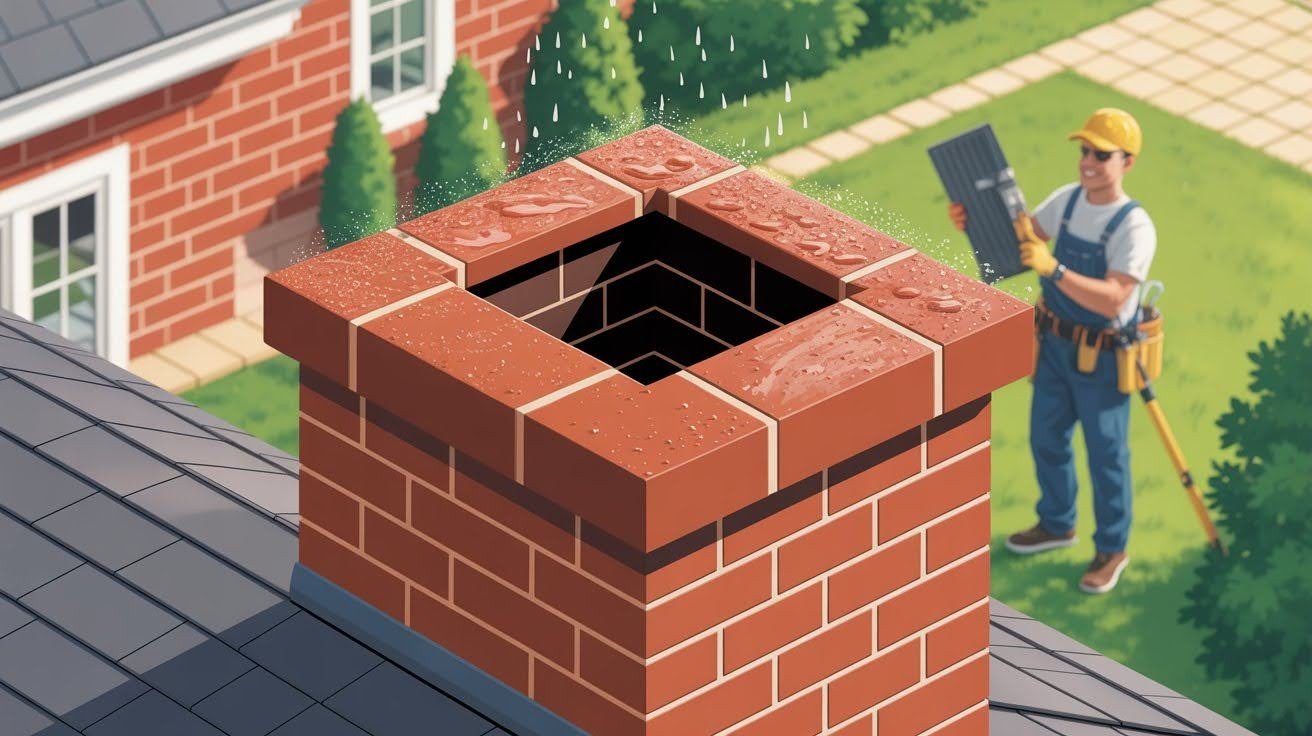
Water-Related Damage
Check walls and ceilings near your chimney for unexplained stains or moisture spots. Mold or mildew growth around the chimney area indicates water infiltration through damaged mortar joints.
Structural Concerns
A leaning or visibly unstable chimney requires immediate professional evaluation. Weak mortar joints compromise overall stability and can escalate quickly during severe weather or temperature changes.
Benefits of Chimney Tuckpointing
Structural Stability
Tuckpointing prevents your chimney from leaning or collapsing by reinforcing weakened mortar joints. This process restores the original strength that keeps your masonry structure solid and secure.
Water and Moisture Protection
Sealed mortar joints create a waterproof barrier that prevents moisture from entering your chimney and home interior. This protection reduces the risk of mold, mildew, and wood rot that can spread throughout your house.
Cost-Effectiveness
Professional tuckpointing costs significantly less than full chimney reconstruction while providing comparable structural benefits. This maintenance approach can extend your chimney’s lifespan by decades, making it a smart financial investment.
Improved Aesthetics and Home Value
Fresh tuckpointing restores the clean, professional appearance of your brickwork and makes your entire property look well-maintained. This improvement increases curb appeal and can boost your home’s market value.
Step-by-Step Tuckpointing Process
Step 1 – Remove Damaged Mortar
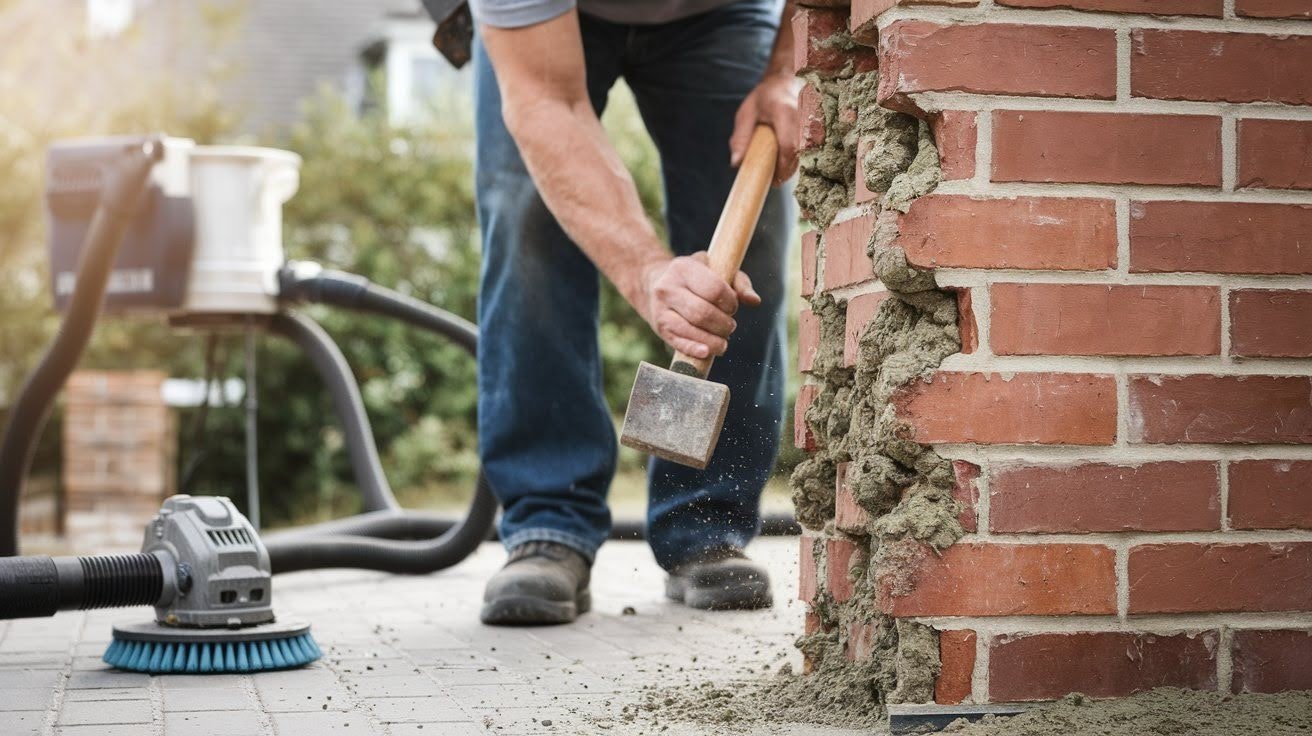
Remove old mortar to 3/4-1 inch using a cold chisel for small areas or an angle grinder for larger sections.
Work carefully to avoid chipping bricks. Clean out loose debris with a wire brush and vacuum. Stop cutting when you reach solid, undamaged mortar that doesn’t crumble.
Step 2 – Clean the Joints
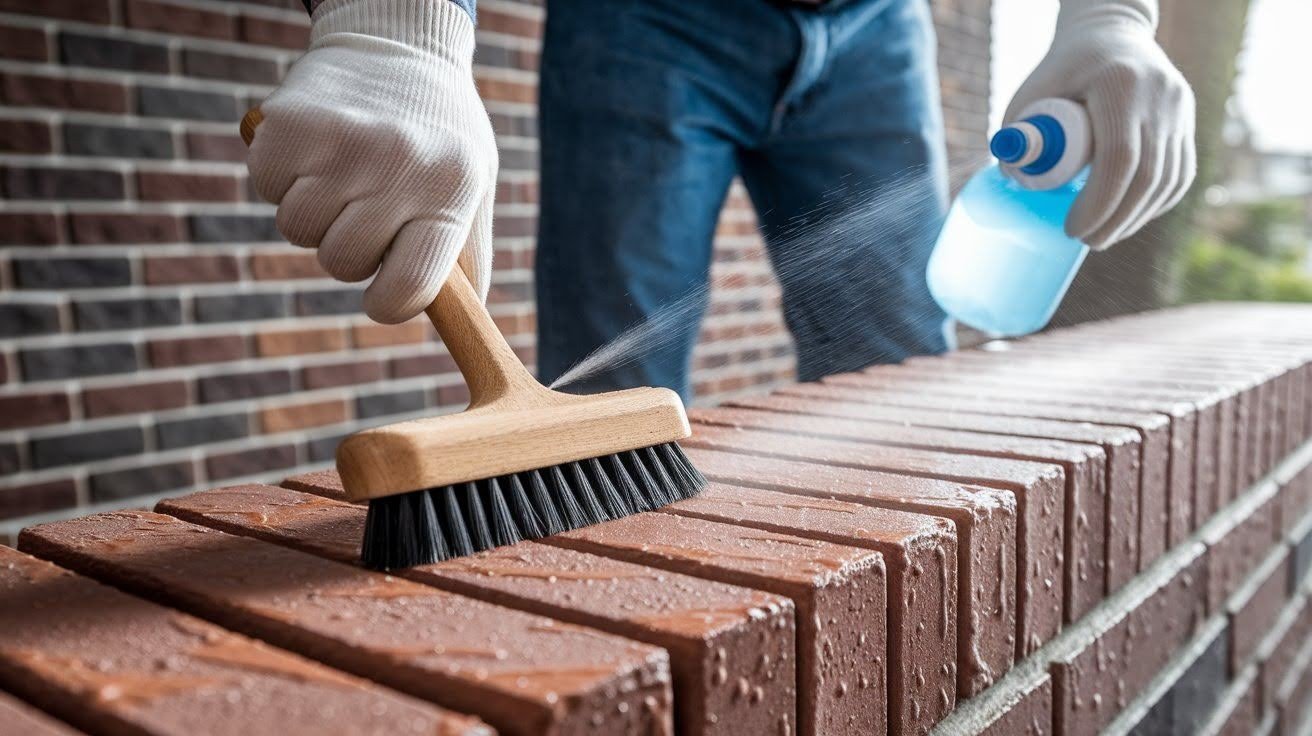
Brush away dust and lightly dampen joints with water. Keep joints moist but not soaking wet for better mortar bonding. Allow excess water to drain before applying new mortar.
Step 3 – Prepare the Mortar
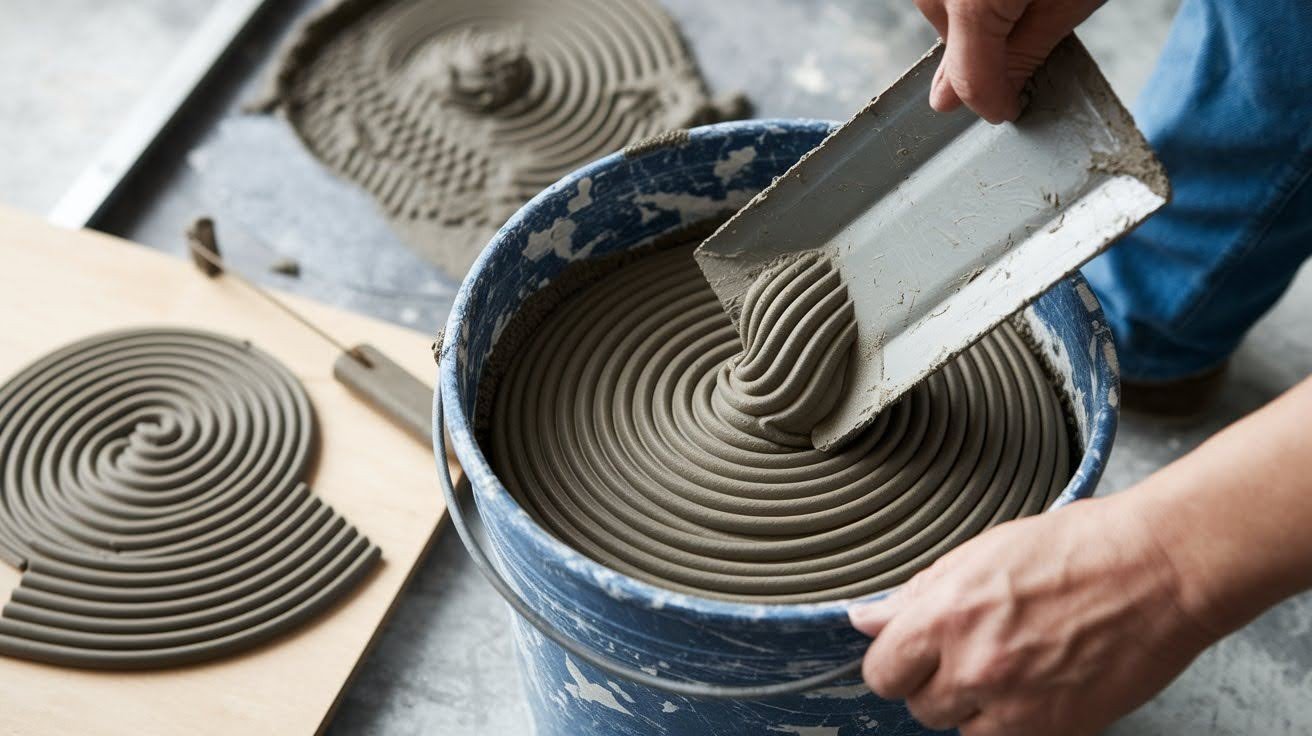
Mix mortar per the manufacturer’s instructions to a thick, workable paste. Test color samples first if matching existing mortar is important. Only mix what you can use within 30 minutes to prevent hardening.
Step 4 – Fill the Joints
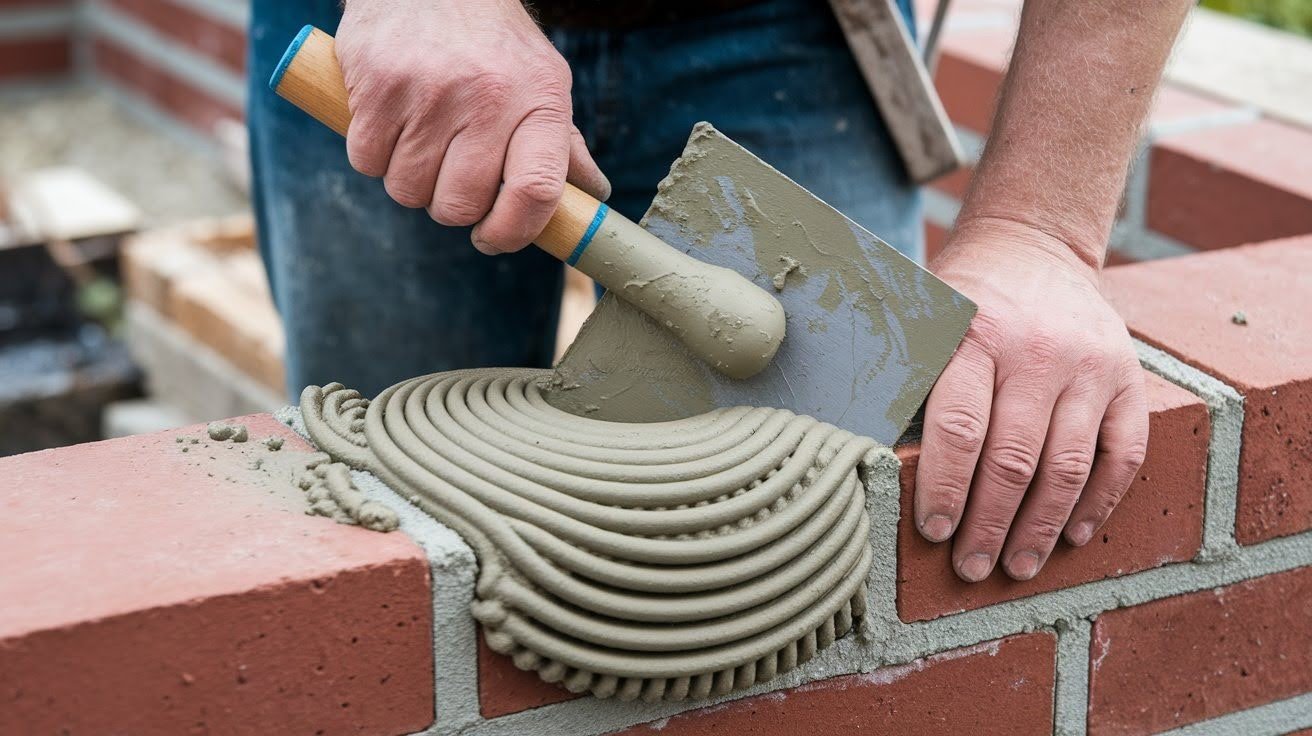
Pack mortar firmly into joints using a pointing trowel. Apply in layers for deep areas. Ensure full contact with brick surfaces to avoid gaps.
Work methodically to maintain consistent pressure and avoid air pockets.
Step 5 – Tool the Joints and Match Profile
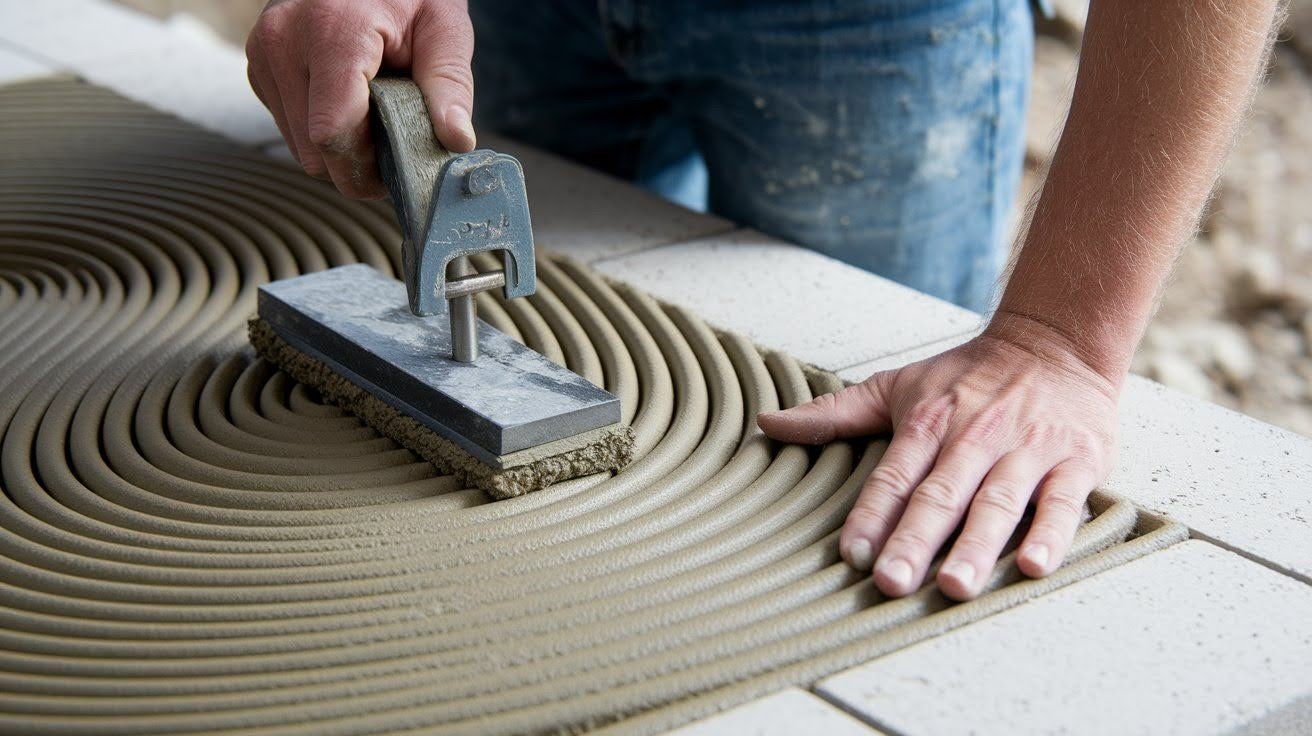
When mortar feels thumbprint-firm, shape joints with a jointer to match the existing profile. This compacts mortar and improves weather resistance. Move the tool smoothly in one direction for the cleanest finish.
Step 6 – Clean Excess Mortar and Final Brushing
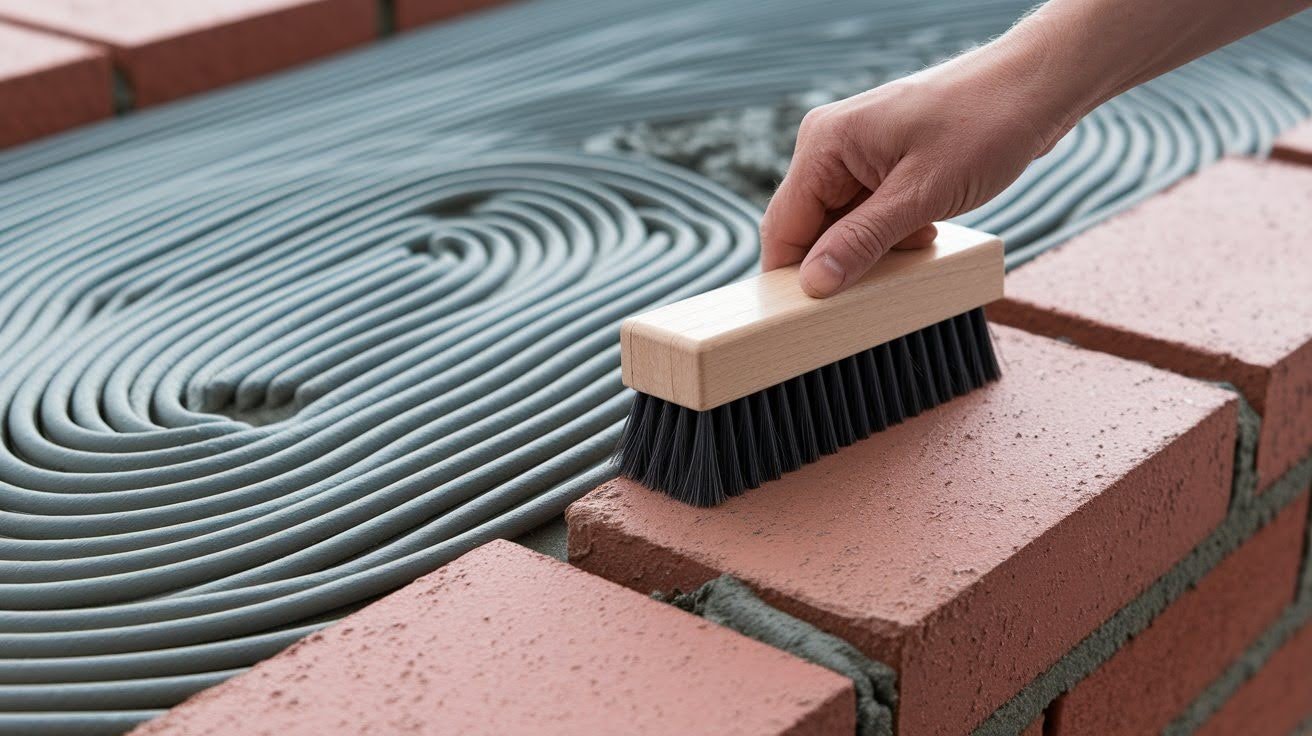
Brush lightly with a soft brush to remove loose particles. Avoid aggressive cleaning that could damage fresh mortar. Wait until the mortar surface firms up before brushing to prevent smearing.
Step 7 – Cure Properly
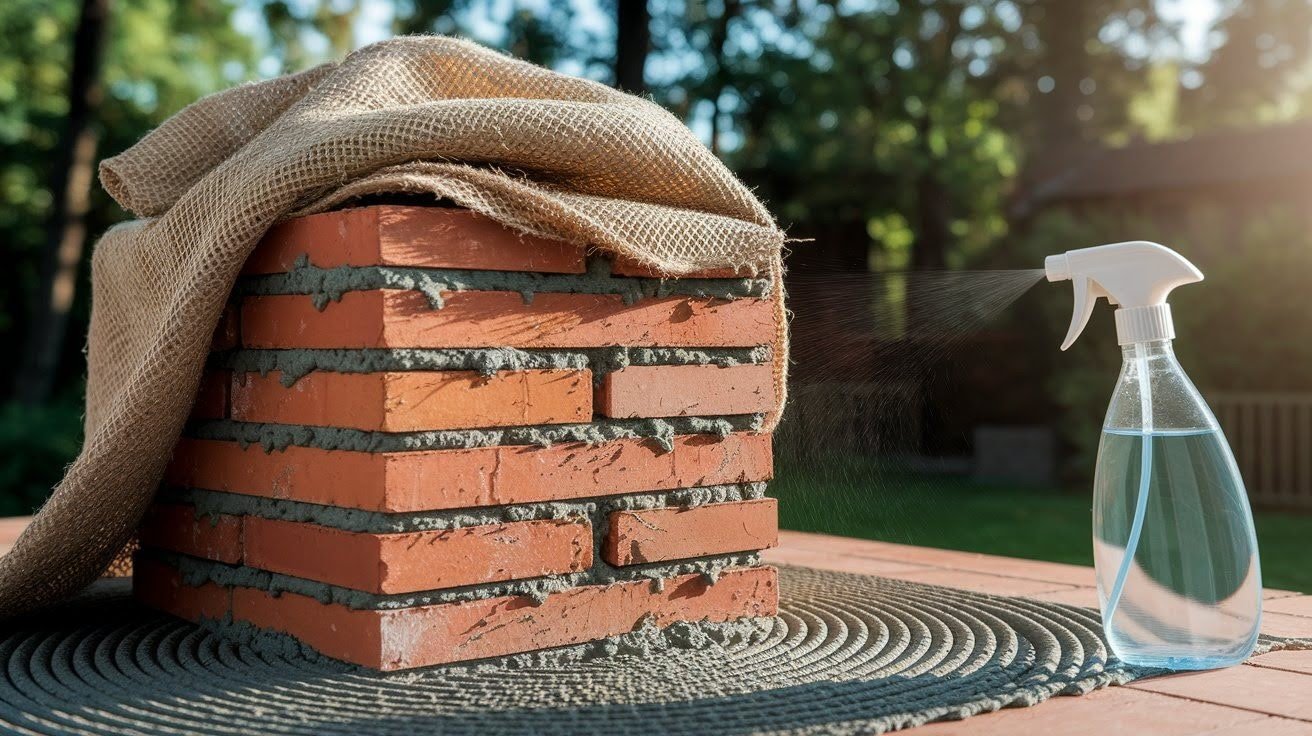
Keep mortar damp for several days by misting periodically. Protect from rain, sun, and wind with damp burlap or plastic sheeting. Proper curing prevents cracking and ensures maximum strength development.
Step 8 – Final Inspection and Touch-ups

Check for cracks or gaps while the mortar is workable. Make color adjustments after full curing if needed. Document your mortar mix recipe for future maintenance work.
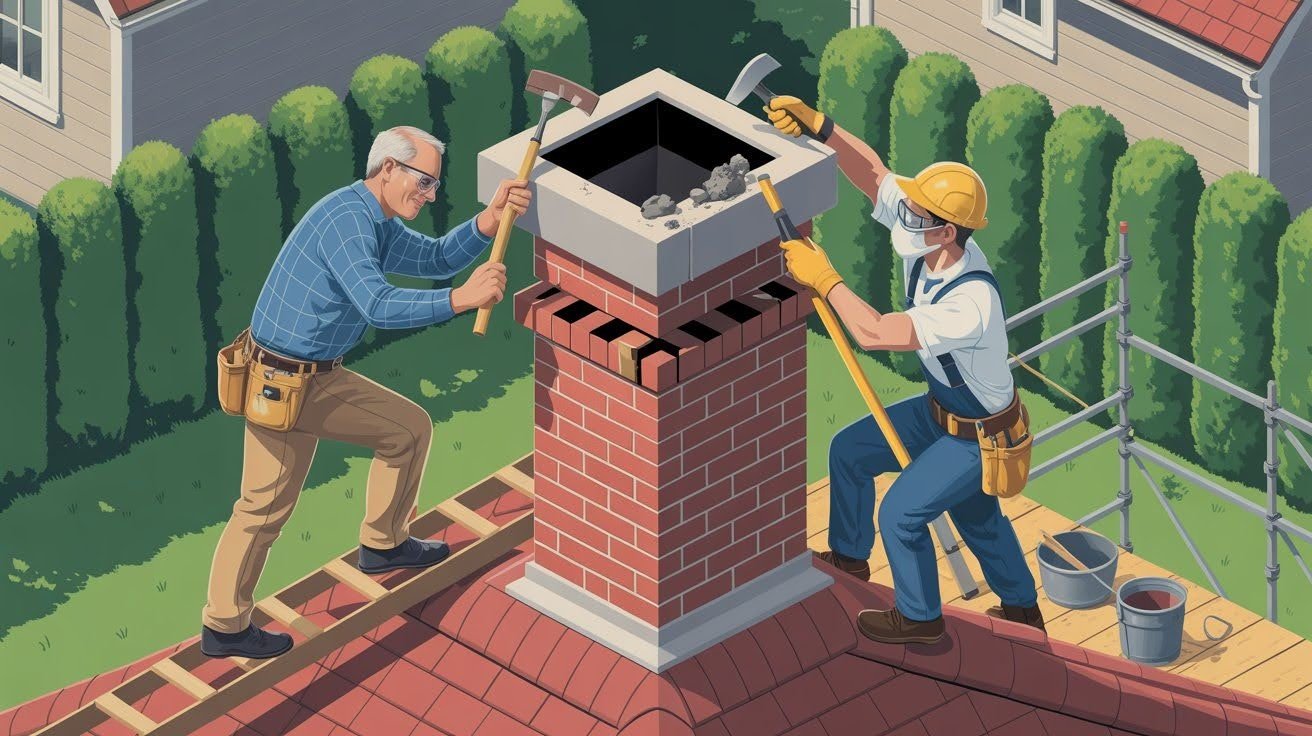
DIY vs Professional Tuckpointing
Deciding between tackling tuckpointing yourself or hiring a professional depends on your skills, available time, and project complexity.
DIY Tuckpointing
Basic tuckpointing requires tools including a mortar raking tool, hammer, chisel, joint filler, jointing tool, and masonry hawk.
The process involves removing old mortar, cleaning debris, and applying fresh mortar in small sections.
Color matching presents the biggest challenge, so test small batches on hidden areas first and keep detailed notes about mixing ratios.
Hiring a Professional
Choose professionals for tall chimneys, extensive damage, or structural issues that exceed typical DIY capabilities.
Select qualified masons by reviewing portfolios, checking customer references, and verifying proper licensing and insurance.
Look for contractors with specific chimney experience rather than general masonry work, as established professionals understand local climate challenges and material compatibility issues.
Products That Make Tuckpointing Easier

Mor-Flexx
This latex acrylic caulk remains flexible after curing and resists cracking during temperature changes. It offers excellent adhesion to masonry surfaces and cures within 24-48 hours.
Traditional Mortar
Portland cement-based mortar provides historical accuracy and proven longevity. It requires more mixing preparation but offers reliable strength and weather resistance.
Latex Acrylic Sealants
These modern alternatives offer faster application times and enhanced flexibility. They work well in temperatures between 40-90°F and require thorough joint cleaning before application.
Conclusion
Your chimney deserves the same attention you give other critical home systems. Regular tuckpointing protects your family’s safety, preserves your home’s structural integrity, and maintains its visual appeal for years to come.
Don’t wait until small cracks become major problems. Schedule annual chimney inspections and address mortar issues promptly.
What seems like a minor repair today could save you thousands in reconstruction costs tomorrow.
Ready to protect your investment? Contact a qualified mason for professional assessment, or consider reliable products like Mor-Flexx for smaller repairs you can handle yourself.
Your chimney has faithfully served your home through countless seasons. Now it’s time to return that care with proper maintenance that keeps your family safe and your property valuable.
Frequently Asked Questions
How often should I have my chimney tuckpointed?
Most chimneys need tuckpointing every 10-15 years, depending on weather exposure. Annual inspections help catch problems early and extend repair intervals.
Can I do tuckpointing myself, or should I hire a professional?
Simple ground-level repairs can be DIY projects with proper tools. Tall chimneys or extensive damage require professional expertise for safety and quality.
How much does chimney tuckpointing typically cost?
Professional tuckpointing costs $500-2,000, depending on chimney size and damage. This prevents expensive full reconstruction costing $5,000-15,000.
What’s the difference between tuckpointing and repointing?
Both terms describe the same process of removing damaged mortar and replacing it. The masonry industry uses these terms interchangeably.
How long does tuckpointing last once completed?
Quality tuckpointing typically lasts 15-25 years in most climates. Regular maintenance can extend this lifespan significantly.