

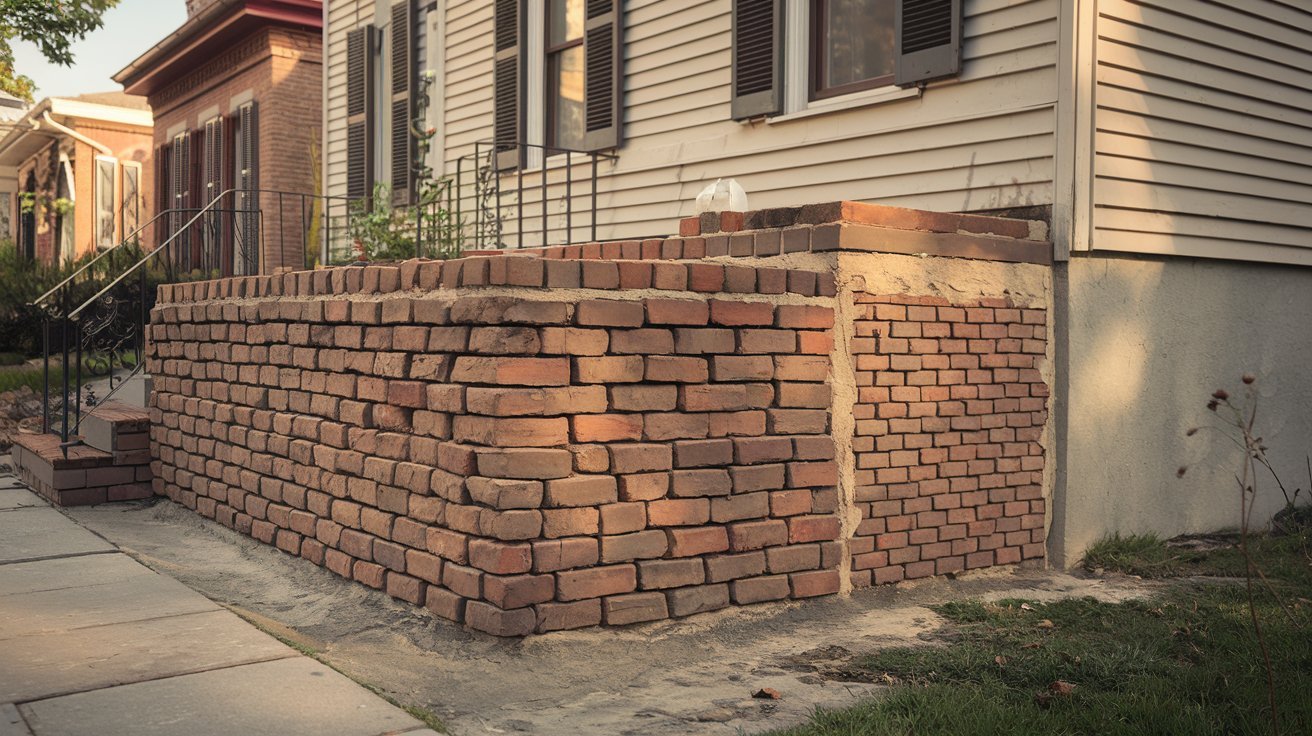
Brick foundations form the backbone of many older homes, providing structural stability that has withstood decades of use.
These time-tested foundations require regular maintenance to continue performing their critical role in supporting your home’s weight and protecting against moisture infiltration.
Addressing foundation issues promptly prevents minor problems from developing into major structural concerns that could cost thousands to remedy. Small cracks or settling issues, when left unattended, can compromise your home’s safety and value.
This comprehensive guide walks you through identifying common brick foundation problems, gathering necessary tools and materials, and executing effective repair techniques.
You’ll learn professional methods to restore your foundation’s integrity, ensuring your home remains safe and structurally sound for years to come.
Understanding Brick Foundations
What Is a Brick Foundation?
Brick foundations consist of multiple layers of fired clay bricks laid with mortar to create thick supporting walls beneath homes.
Popular in the late 1800s and early 1900s, these foundations typically measure 8 to 12 inches thick and extend below ground level to distribute the home’s weight evenly across the soil.
Solid Brick vs. Brick Veneer
It’s important to distinguish between solid brick foundations and brick veneer. Solid brick foundations use bricks as the primary structural element, bearing the full load of the house. These foundations extend deep into the ground and form the actual supporting structure.
Brick veneer, on the other hand, serves as a decorative exterior covering over a different foundation material, such as concrete block or poured concrete. The veneer provides aesthetic appeal but doesn’t carry structural loads.
Regional Relevance and Historical Context
Brick foundations became especially common in the Midwest and Northeast, where clay deposits made brick production economical. Cities like Chicago, Detroit, and Boston feature countless homes with original brick foundations that continue functioning today.
Understanding your foundation type helps determine the most appropriate repair approach for your specific situation.
Identifying Common Causes of Damage
What Damages Brick Foundations?
Understanding the root causes of brick foundation damage helps homeowners recognize warning signs early and take preventive action.
Several factors can compromise the integrity of these sturdy structures over time.
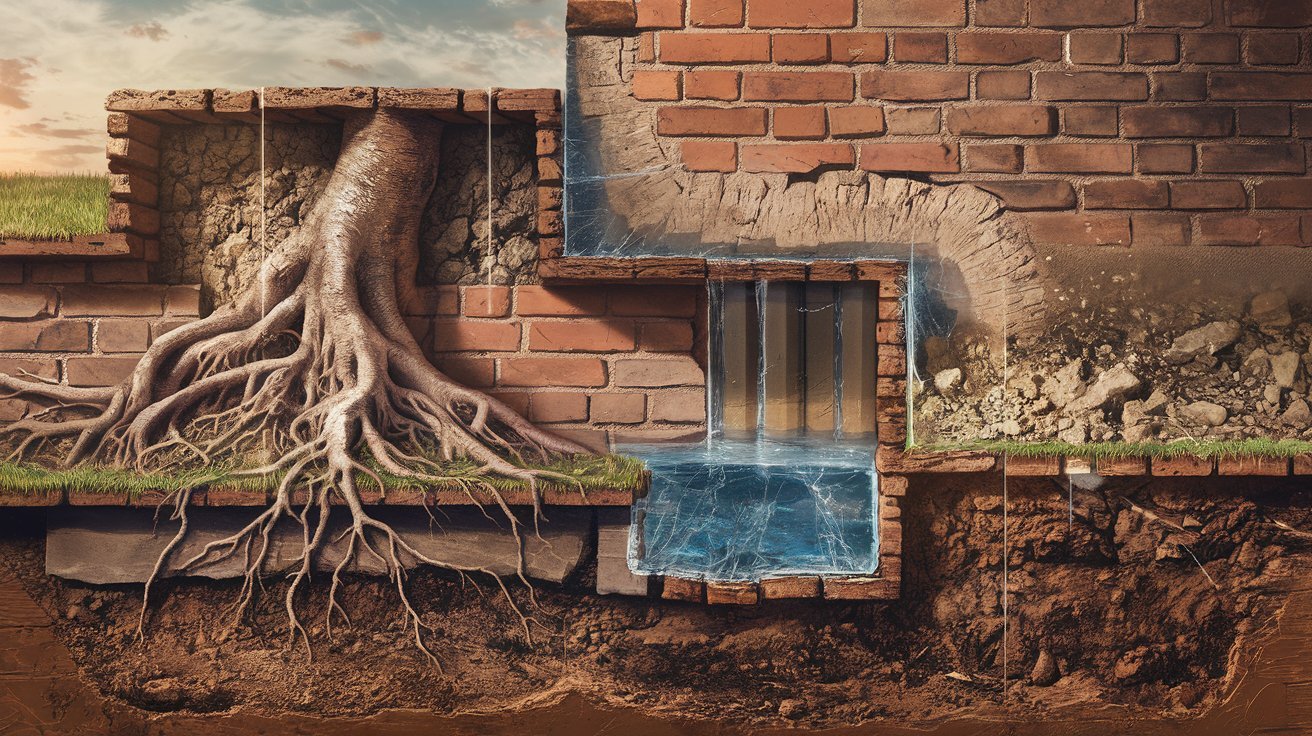
Soil Shifting and Foundation Settling
Natural soil movement creates stress on brick foundations. Clay soils expand when wet and contract during dry periods, causing uneven settling. Poor soil compaction during construction leads to differential movement, creating cracks and structural instability.
Poor Drainage and Water Intrusion
Inadequate drainage allows water to pool around foundations, creating hydrostatic pressure. Water penetration through mortar joints causes spalling, efflorescence, and structural weakening that compromises foundation integrity.
Tree Roots and Nearby Construction
Large tree roots growing beneath foundations exert upward pressure, causing cracking and displacement. Nearby construction activities and heavy machinery create vibrations that affect stability and worsen existing damage.
Freeze-Thaw Cycles
Repeated freezing and thawing of water within brick and mortar joints causes expansion and contraction. This process gradually breaks down mortar, creates larger cracks, and loosens bricks over multiple seasons.
Age and Mortar Wear
Time naturally degrades mortar joints through weathering and chemical reactions. Original lime-based mortars become soft and crumbly, losing their ability to hold bricks securely and allowing water infiltration.
Know Your Limits: When Expert Help Is Essential
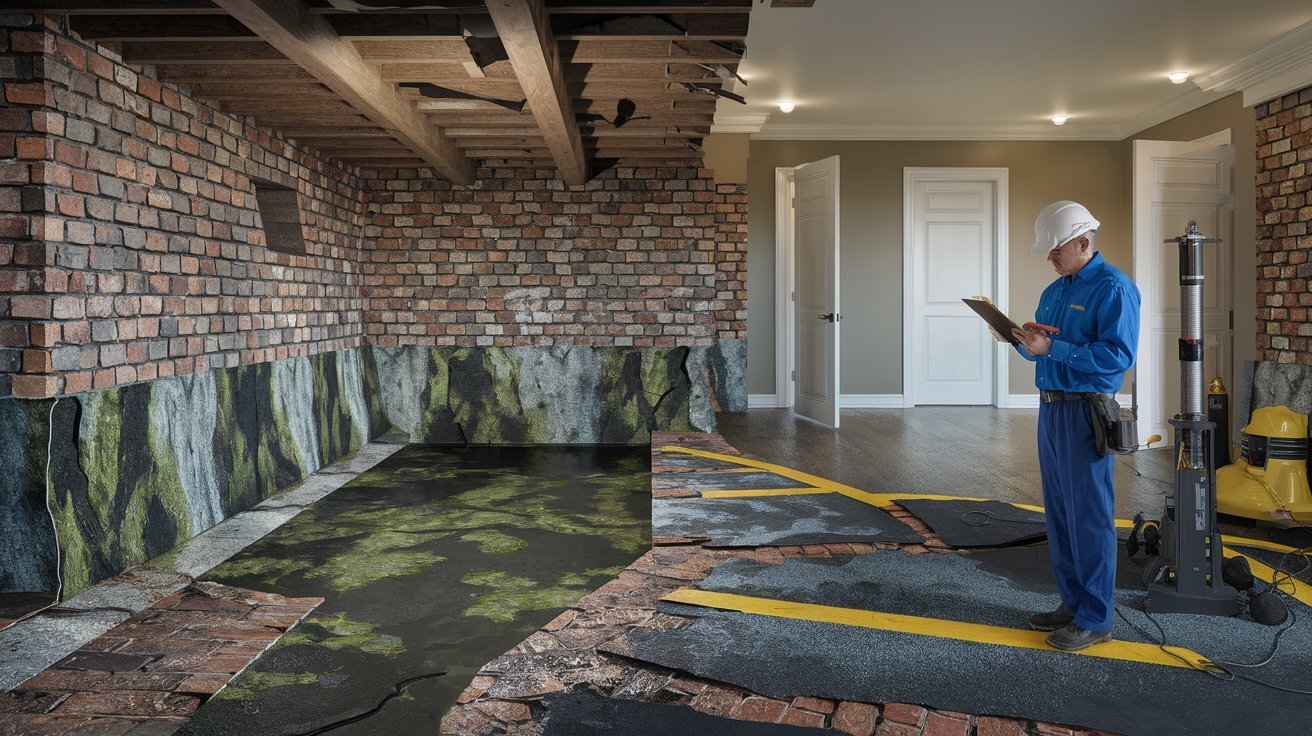
Warning Signs You Shouldn’t Ignore
Certain foundation problems require immediate professional intervention to prevent structural failure and protect your family’s safety.
-
Large Cracks or Bowing Walls
Cracks wider than a quarter-inch or bowing walls indicate serious structural compromise. Horizontal cracks are particularly concerning as they often signal foundation failure that could lead to wall collapse.
-
Water Intrusion and Mold
Persistent water leaks create ideal conditions for mold growth and structural rot. Standing water, musty odors, or visible mold require professional waterproofing solutions and may indicate compromised foundation integrity.
-
Doors and Floors Misaligned
When doors stick, windows won’t close properly, or floors become uneven, your foundation has shifted significantly. These symptoms indicate the house frame is no longer square.
Benefits of Hiring a Specialist
Professional foundation contractors bring expertise and resources that ensure lasting repairs.
-
Accurate Diagnosis
Experienced contractors distinguish between cosmetic issues and serious structural problems. They identify root causes rather than treating symptoms, preventing recurring damage.
-
Access to Professional Tools
Specialists use equipment like laser levels, hydraulic jacks, and commercial-grade materials unavailable to homeowners. These tools enable precise repairs that meet building codes.
-
Insurance and Warranties
Licensed contractors carry liability insurance and offer warranties on their work, protecting you from financial responsibility and ensuring repairs meet professional standards.
Tools and Materials You’ll Need
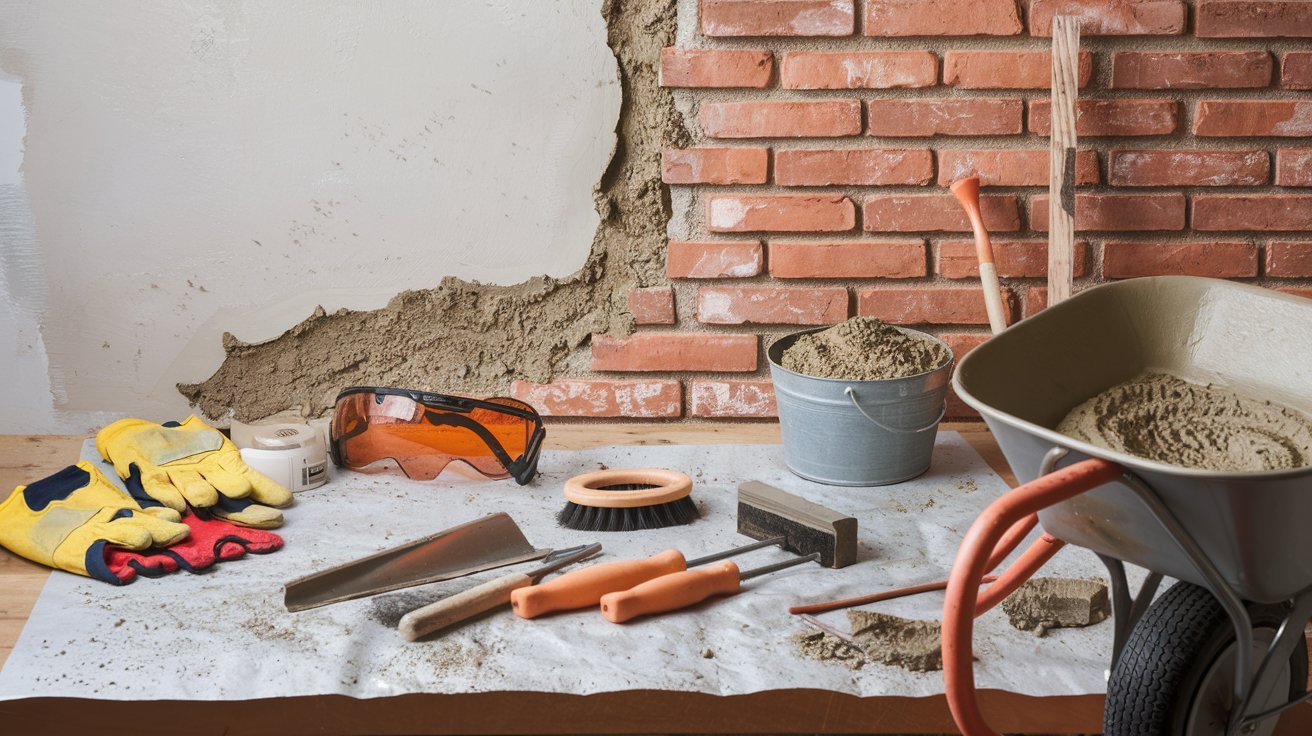
Basic Tools
Having the right tools makes brick foundation repair more efficient and ensures professional-quality results.
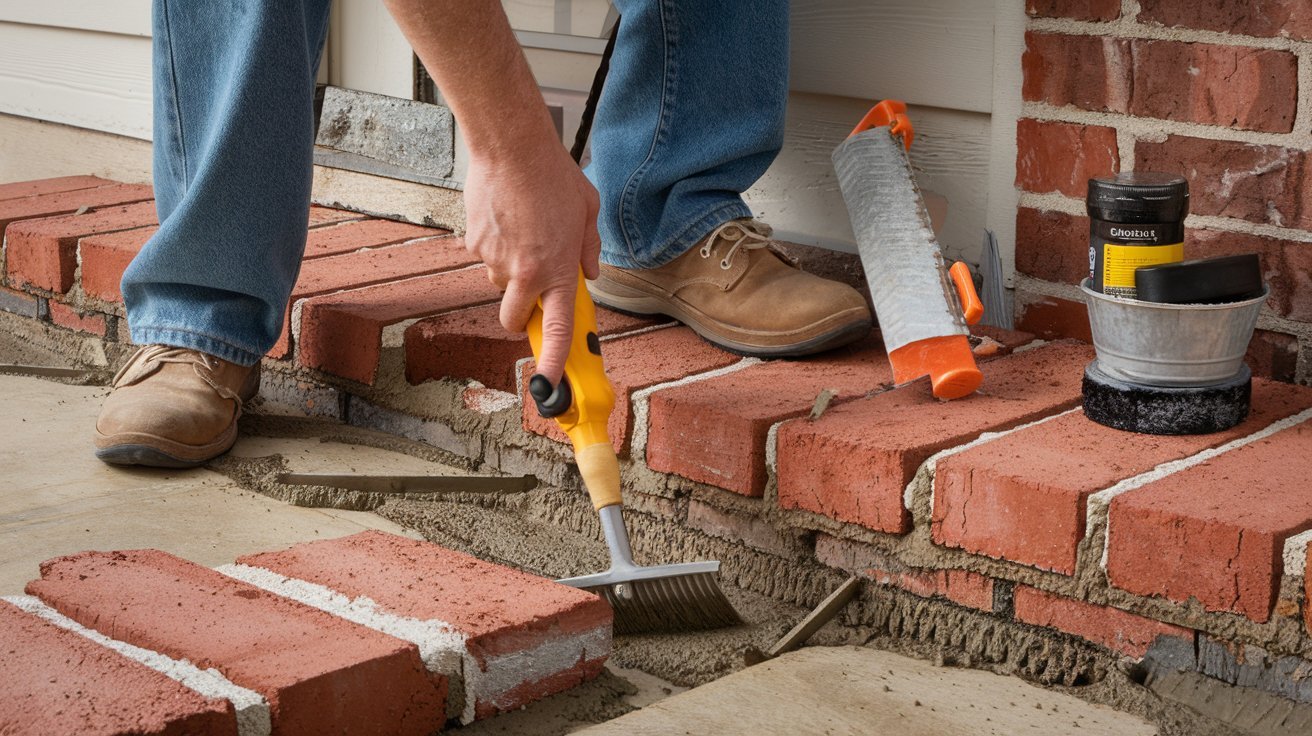
Pointing Trowel, Joint Raker, Wire Brush
A pointing trowel applies and shapes mortar in tight spaces between bricks. Joint rakers remove old, deteriorated mortar from joints. Wire brushes clean debris and loose material from brick surfaces, preparing them for new mortar application.
Materials
Quality materials ensure your repairs last and match the existing foundation appearance.
Mortar Mix, Safety Gear, Chisel, Masonry Hammer
Select a mortar mix that matches your existing foundation’s strength and color. Safety gear includes protective eyewear, dust masks, and work gloves. Cold chisels help remove damaged bricks and stubborn mortar, while masonry hammers provide controlled striking force.
Estimated Costs
Small-scale repointing projects typically cost $50-150 in materials. Basic tool purchases add $75-200 if you don’t own them. Tool rental reduces costs to $25-50 per day. Major repairs may require $300-800 in materials.
Compare against professional quotes of $500-2,000 to determine if DIY makes financial sense.
Step-by-Step Process: Brick Foundation Repair
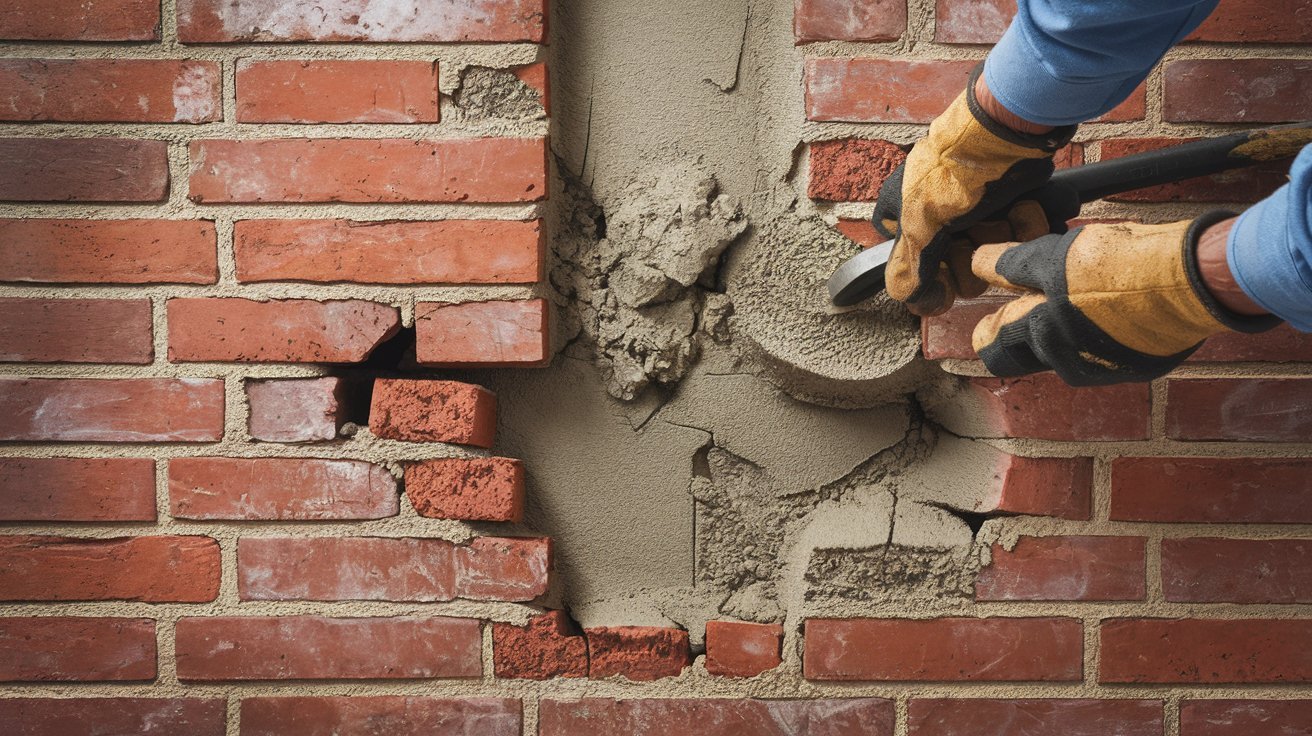
Step 1: Inspect and Assess Damage
Examine foundation walls for cracks, loose mortar, and water damage. Document problem areas with photos and measurements to determine repair priorities and track progress.
Step 2: Clean the Area
Remove loose mortar and debris using a joint raker or chisel. Use a wire brush to scrub dirt and mineral deposits from brick surfaces. Clear vegetation and ensure proper work access.
Step 3: Repair Cracks and Replace Mortar
Apply fresh mortar to cleaned joints using tuckpointing techniques. Fill cracks with patching compound, working bottom to top. Press mortar firmly and smooth with a pointing trowel.
Step 4: Reinforce If Necessary
Install metal ties across cracks for structural reinforcement. Add wall braces for areas showing displacement. Ensure all reinforcement materials are properly secured before final repairs.
Step 5: Seal and Waterproof
Apply breathable sealant to repaired areas once mortar cures. Focus on water-prone areas and ensure complete coverage for long-term protection against future damage.
Levels of Repair: Minor to Major
Minor Repairs
-
Tuckpointing and Mortar Patching
Small-scale maintenance involving repointing deteriorated mortar joints, filling hairline cracks, and replacing individual damaged bricks. These repairs typically affect less than 10% of the foundation surface.
-
DIY-Friendly Solutions
Minor repairs use standard masonry tools and hardware store materials. Homeowners can complete these straightforward projects over weekends with proper preparation and safety precautions.
Moderate Repairs
-
Crack Stitching, Wall Bracing
Mid-level repairs address larger cracks or minor wall movement through reinforcement systems, temporary supports, or specialized anchoring. Work requires understanding of structural loads and proper installation techniques.
-
Requires Professional Input
Professional consultation is recommended for proper assessment and technique guidance. These repairs often need building permits and may require engineered solutions to meet local codes.
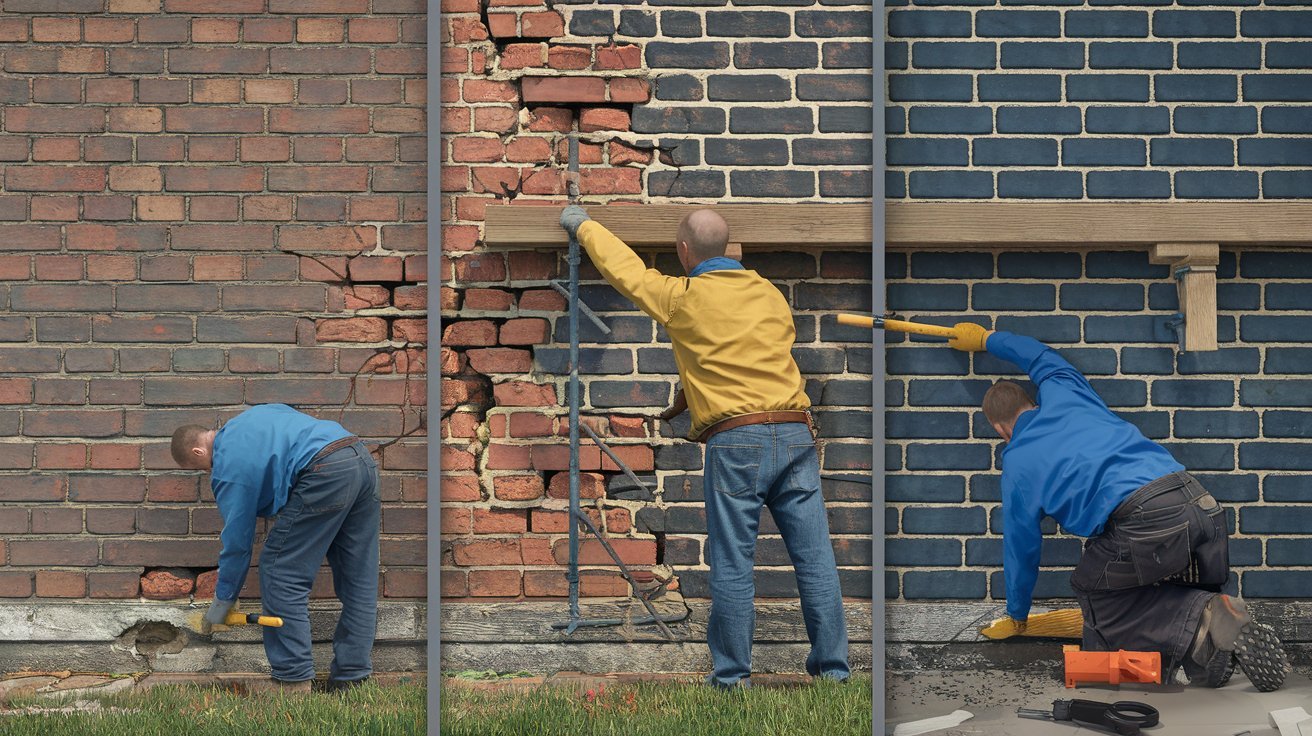
Major Repairs
-
Underpinning and Rebuilding
Extensive structural work involving foundation replacement, complete wall reconstruction, or underpinning. These address severe settlement, structural failure, or foundation inadequacy using heavy equipment and specialized techniques.
-
Permits and Engineering Required
Major repairs always require building permits, structural engineering analysis, and professional contractors. Licensed professionals ensure compliance with building codes and structural safety standards.
Preventing Future Foundation Problems
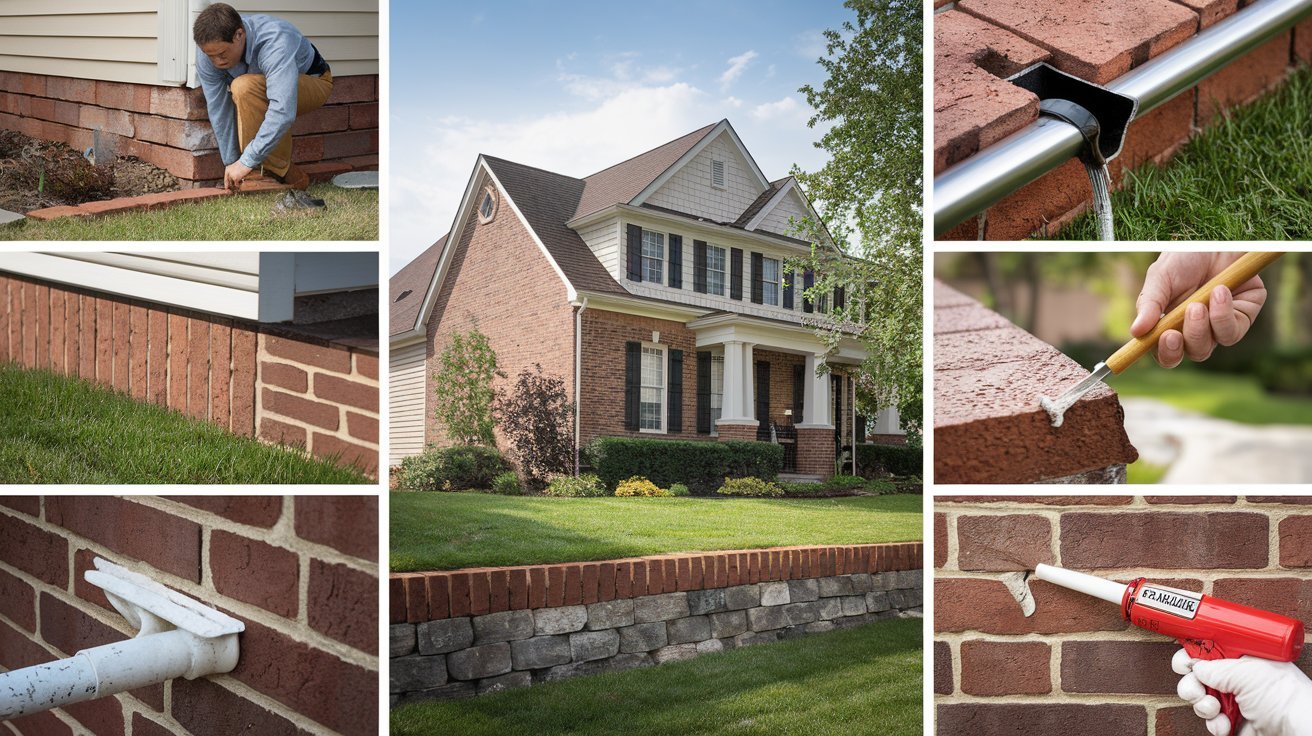
Maintenance Tips
Proactive maintenance protects your brick foundation investment and prevents costly repairs. Regular attention to key areas keeps your foundation stable and dry for decades.
Improve Drainage and Grading
Ensure ground slopes away from your home at least 6 inches over the first 10 feet. Install French drains if water pools near your foundation. Poor drainage causes soil saturation and foundation movement.
Maintain Gutters and Downspouts
Clean gutters regularly to prevent overflow against foundation walls. Extend downspouts at least 4 feet from your home’s perimeter. Clogged gutters create concentrated water flow that increases pressure on foundation walls.
Regular Inspections and Sealing
Walk around your foundation twice yearly, checking for cracks, loose mortar, or water infiltration signs. Apply breathable masonry sealer every 3-5 years to protect against moisture penetration.
Address Cracks Early
Fill hairline cracks immediately with appropriate sealant to prevent water infiltration and freeze-thaw damage. Monitor existing cracks for growth. Early intervention prevents minor issues from becoming structural emergencies.
Common Mistakes to Avoid
Ignoring Small Cracks
Dismissing hairline cracks as cosmetic leads to water infiltration, freeze-thaw damage, and structural compromise. Small $20 repairs can escalate into thousands in foundation reconstruction.
Using Incorrect Mortar Type
Modern Portland cement is stronger than original lime-based mortars in older homes. Hard modern mortar doesn’t allow natural movement and can crack adjacent bricks during settling.
Rushing Through Repairs
Skipping cleaning steps or not allowing proper curing time compromises repair strength. Rushed work often fails within months, requiring complete redo.
DIYing Major Structural Issues
Attempting underpinning or major crack stabilization without training creates safety risks and code violations. Failed DIY attempts worsen problems and increase final costs.
Conclusion
Maintaining your brick foundation requires a systematic approach: inspect and assess damage, clean affected areas, repair cracks and replace mortar, reinforce when needed, and seal for waterproofing.
Regular maintenance through proper drainage, gutter care, and routine inspections prevents minor issues from becoming major problems.
Handle simple tuckpointing and small crack repairs yourself, but consult professionals for structural concerns, large cracks, or complex reinforcement work. The investment in timely repairs protects your home’s value and your family’s safety.
Your foundation supports everything above it, making its care essential.By following these guidelines and staying proactive with maintenance, you’ll ensure your brick foundation continues providing reliable support for decades.
Remember, small actions today prevent expensive emergencies tomorrow.
Frequently Asked Questions (FAQs)
How long does brick foundation repair typically take?
Minor repairs like repointing can be completed in 1-2 days, while moderate repairs may take a week. Major structural work can extend several weeks depending on the extent of damage and weather conditions.
Can I repair my brick foundation during winter months?
Cold weather slows mortar curing and can cause freeze damage to fresh repairs. Schedule foundation work during mild weather when temperatures stay above 40°F for at least 48 hours after completion.
How much does professional brick foundation repair cost?
Minor repointing typically costs $500-1,500, while moderate repairs range from $2,000-5,000. Major structural work can cost $10,000-25,000 depending on the scope and local labor rates.
What type of mortar should I use for older brick foundations?
Match the existing mortar strength and composition – older homes often need lime-based mortar rather than modern Portland cement. Consult a masonry supplier to identify the correct type for your specific foundation.
How often should I inspect my brick foundation for problems?
Conduct visual inspections twice yearly, ideally in spring and fall. Look for new cracks, loose mortar, water stains, or signs of settling that require immediate attention.